Easter Craft
 Self-Hardening Salt Clay:
Ingredients:
1.5 C Salt
4 C Flour
1.5 C H2O
Tools:
Rolling Pin
Cookie Cutters
Chop Stick (or other poking device)
Paint
Embellishments
Ribbon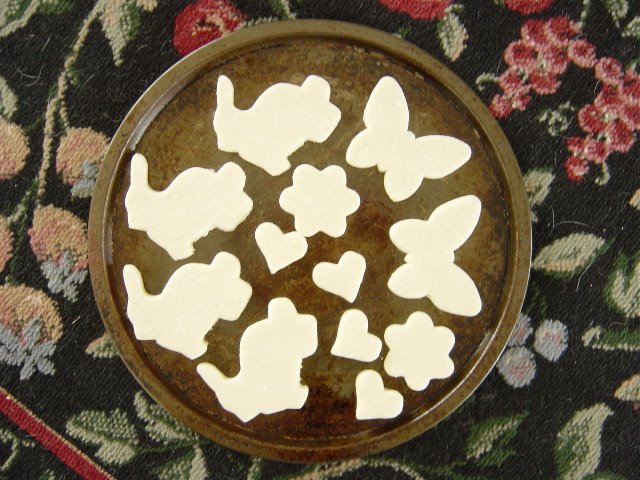 Process:
Flex your muscle, and stir it all together. Roll it out to desired thickness and begin pressing cookie cutters. Since this is an Easter craft, we used bunny rabbits, butterflys, hearts, and flower cookie cutters. Remember that if you want to hang it up by a ribbon, you'll need to poke a hole in the cookie before it bakes. Bake @ 300* for 30-40 minutes, or until hard.
Before you begin painting, use a chop stick to make sure the hole for the ribbon is passable. Now you are ready to decorate your cookie keepsake....go to town & have fun with it! Just put down a towel or old tablecloth to catch the spills. Paint & let dry. Then embellish with what you have on hand. We happened to have squiggly eyes, glitter glue, & paint this time. In the past, we've used crayons, markers, sequins, buttons, and watercolors. (I don't recommend watercolors because it makes the cookie too soggy) Thread the ribbon through the hole and tie in a knot. Several strung together makes a cute decoration. Spray with acrylic spray if you want it to last forever.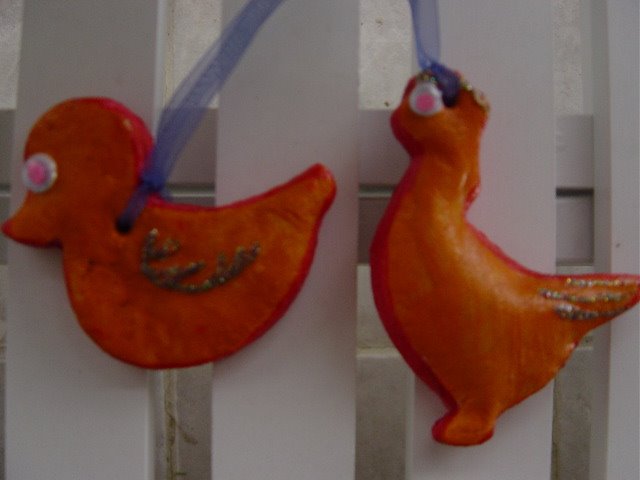
We have made these for personalized party favors, place tags, Christmas ornaments, Halloween treats, and they have even been seen hanging from our chandeliers and window handles. This time, I just wrote the girls' names & the year on the back with a Sharpie for a memento of the holiday & hung them up in our kitchen window.
PS: I figured this would be an appropriate post for a food blog since I'm working with flour/salt/water....And an added bonus is that since these cookies aren't to be eaten, it is totally Low-Cal!
Also, let's consider this a vegan recipe since some eggs might be spared by doing this craft instead of the traditional. Happy Easter.


No comments:
Post a Comment