Mr. Pumpkin Head & Pepitas
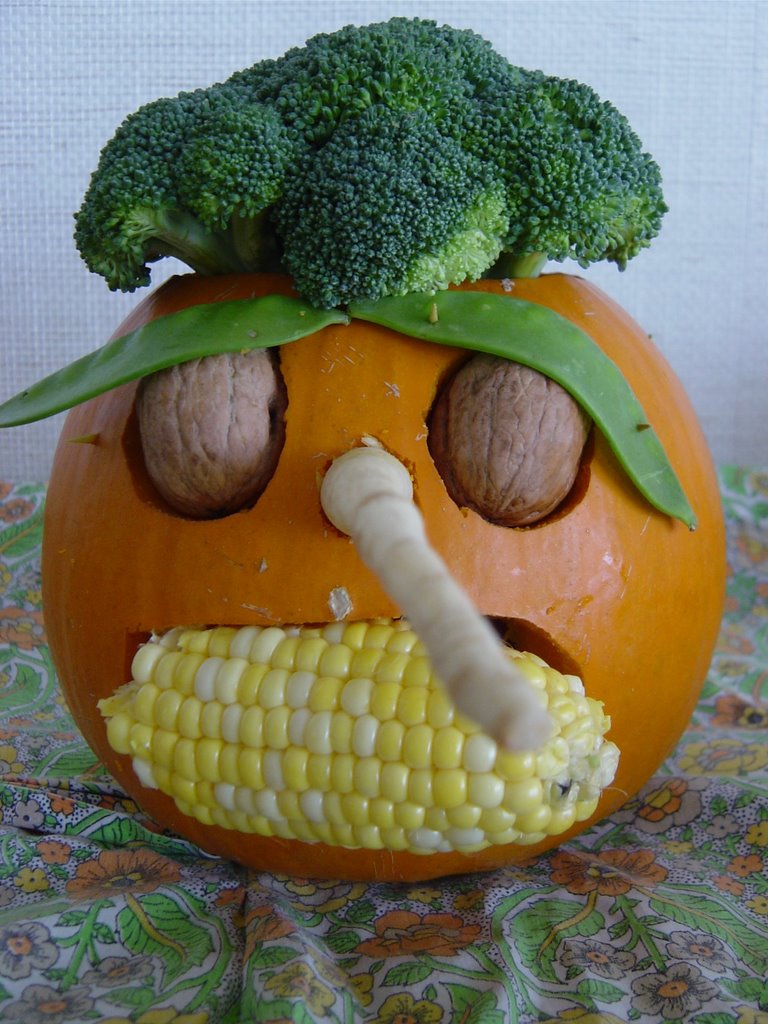 Here's our first attempt at a pumpkin carving this season. The fun here is in using vegetables to create different facial features -- we used: broccoli for his hair, pea eyebrows, walnut eyes, rutabaga nose, and a corn mouth.
Basic Tips:
Eyes Use a melon baller to carve holes for small vegetables like radishes or okra to sit in. Secure the veggies with skewers or toothpicks.
Nose/ears/neck plugs Slice one side off spherical produce (like eggplants) to increase the amount of surface area that rests flat against the pumpkin; affix the veggies with skewers. (Spritz sliced sides with lemon water to keep them from discoloring.) For a long pepper or rhutabaga nose, carve a hole that's a little smaller than the biggest end of the veggie; secure with skewers.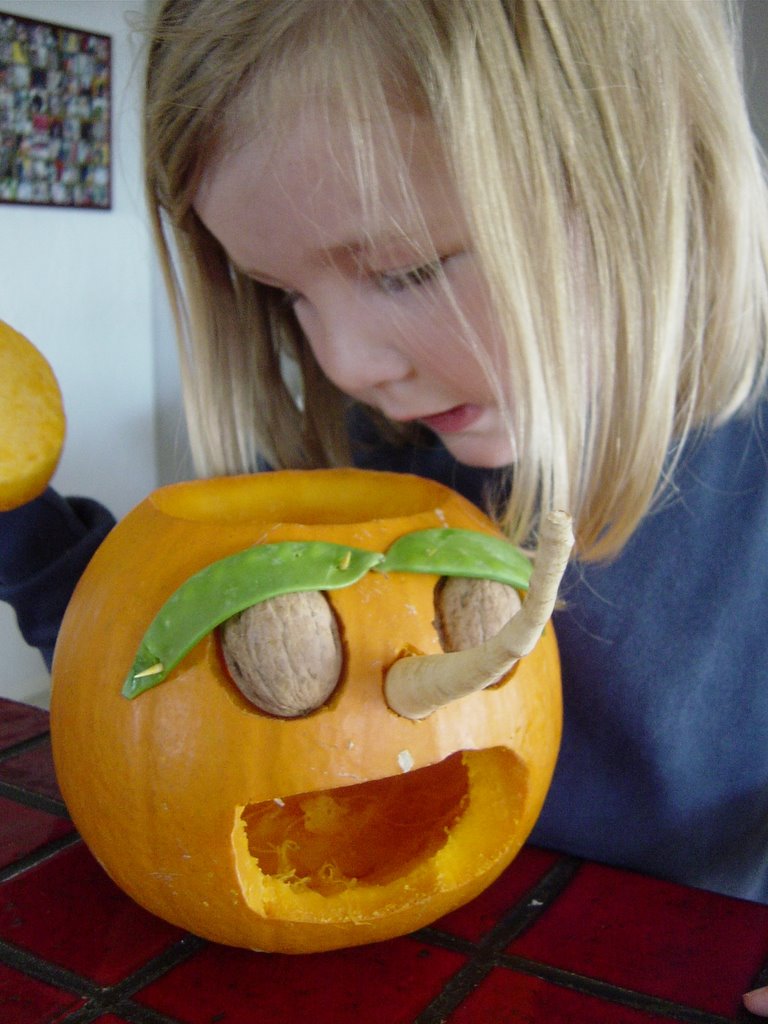
Mouth To cut out a mouth the exact size of a squared-off corn-cob, first trace its outline on the pumpkin with a water-based marker (which can be wiped right off). A mouth that requires no carving (nor parental help): Draw a smile with the marker, prick holes along the line with a skewer, wipe off the marker, then place whole dried cloves in the holes. We want to try this next....
Hair Use a rubber band to attach parsley or cilantro to the pumpkin stem. Affix green beans or snow peas with skewers. Or, do like us, and just put a bunch of broccoli in his head hole for a curly do. Asparagus makes pretty hair also.
"Not a thing inside there, Mr.Pumpkin. Where'd your corny teeth and seed brains go?"
Little and big fingers alike dug into these roasted pumpkin seeds. Emmy of Vegan Diva is right -- these are easy to roast and a very addicting snack. Just rinse the seeds in a collander until clean. Dry on a towel, and then toss with some canola oil and sea salt. Lay the seeds in a single layer on a rimmed cookie sheet, and bake them in a 250 (or less) degree oven. I checked mine every 10 minutes, and it took a while for them to completely dry out. A couple times, I just turned off the oven and left the pepitas inside for up to 30 minutes to slow cook. Then, if they weren't ready, I'd fire up the oven again. As Emmy suggested, we tested a few along the way to know for sure when they were done. Liv ate what remained from yesterday for breakfast this morning.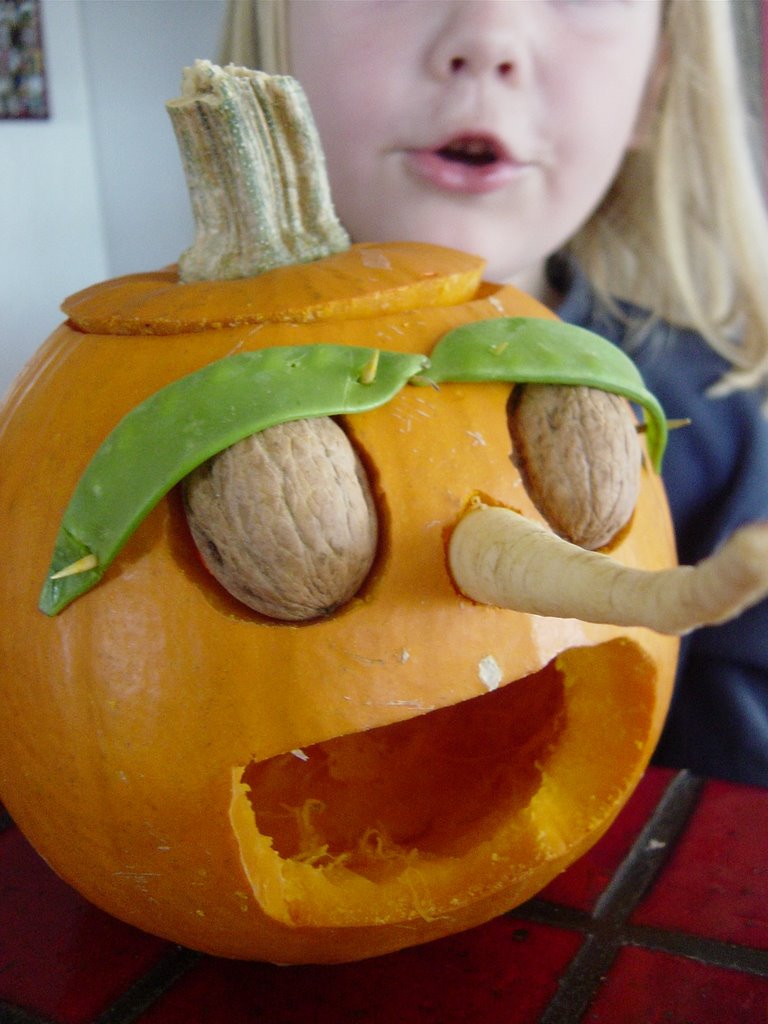
This picture reminds me of an old cartoon on Saturday Night Live, Mr. Bill, "Ohhhhhhh Nooooooooo!"
Pumpkin Preservation Tips:
Look for pumpkins with a sturdy stem, this is the sign of a healthy pumpkin. Don't lift the pumpkin by the stem, this can damage the pumpkin and make it age faster.
Put the pumpkin in a wash tub full of cold water, carved side down -- it'll absorb the water and become firm.
After you've carved your pumpkin, wipe vaseline along the cut edges to preserve -- this prevents water from getting out. If your pumpkin does shrivel, resoak it for several hours and even over night. A little unscented clorox bleach in the water will prevent premature molding by killing evil pumpkin germs. Here's a link to WH Foods with some great information about pumpkin seeds.


No comments:
Post a Comment